I wasn't really able to adjust the brightness of the sun at a significant level but I tried by reducing the thickness of the sky. However, I have created more consistency in the sky and I have also keyframed the azimuth of the sun (that is the distance of the sun from the centre)
The moment when the sun moves off camera is when the camera will turn to follow the eagle. Tell me what you think.
Friday, 31 December 2010
Thursday, 30 December 2010
Sunrise
I have just started to make the sunrise animation that will open the scene. I have tried to adjust the colouring of the sky and the elevation of the sun against the timing of the animation. Please let me know what you think and if there is any improvement to be made.
Also remember to let me know when you have any more finished scenes for me to apply skys to.
Also remember to let me know when you have any more finished scenes for me to apply skys to.
Saturday, 25 December 2010
Monday, 20 December 2010
Alternative Masai texture
Hi All,
I have just come up with another idea for the texturing and lighting of the Masai tribe. I applied a Light Angle Two tone to the Masai that I textured with a dark brown/black colour scheme and I then added a directional light that I pointed at the Masai.
 When I rotated the directional light and set keyframes, here was the outcome.
We now have a choice between a silhouetted Masai figure or this figure that has different levels of colouring depending on the lighting. Please let me know which your would prefer.
Thanks!!
I have just come up with another idea for the texturing and lighting of the Masai tribe. I applied a Light Angle Two tone to the Masai that I textured with a dark brown/black colour scheme and I then added a directional light that I pointed at the Masai.

We now have a choice between a silhouetted Masai figure or this figure that has different levels of colouring depending on the lighting. Please let me know which your would prefer.
Thanks!!
Thursday, 16 December 2010
Lioness
Hey guys here's the final animation on the lioness, thanks so much for helping me out with this.
Wednesday, 15 December 2010
Weapons and balloons
Just to let you know, the fully textured weaponry and hot air balloon can be found in the adrive under the finished models-scenery directory.
Walk cycle
Gabriel,
Here is a basic tutorial on animating a walk cycle. It is specified towards a particular model, but I am sure you will be able to work it out with the lion model.
http://ewestlund.com/downloads/basicWalk_tutorial.pdf
Here is a basic tutorial on animating a walk cycle. It is specified towards a particular model, but I am sure you will be able to work it out with the lion model.
http://ewestlund.com/downloads/basicWalk_tutorial.pdf
Tuesday, 14 December 2010
Wilderbeast drinking test
Hi guys i thought i would do a test for the wildebeest drinking. Its very simple but it looks quite effective. when we have the scene done i can start animating these characters in there habitat.
January 4th 2011
Hey guys, since the college will be opening a week before we start a new-term, I and I'm sure Gary will think the same thing too think we should all team up and finish the project for good. Tuesday January 4th 2011, 10:00am, 5th floor, see u there.
The Oath of Time Management!
Any one who is late must stand in front of the group and say how sorry he/she is and say this;
"Firstly I apologise to the whole group
And promise to never be late again
And will think about the consequences of my actions
"Firstly I apologise to the whole group
And promise to never be late again
And will think about the consequences of my actions
And I will tell Gary what a good and motivated leader he is to all of us
And how hard working my group are
And will always feel bad for thinking I let them down."
For the record this was Gary's idea and I only wrote what he wanted.
And how hard working my group are
And will always feel bad for thinking I let them down."
For the record this was Gary's idea and I only wrote what he wanted.
Monday, 13 December 2010
10AM 14TH DECEMBER 2010!!!!!!! WHOLE GROUP MEETING
Guys as i told you earlier we need to all meet at 10am tomorrow ( 14th December 2010). Its very late in the project now and if any of you dont turn up or are extremely late i will be very annoyed and there will be consequences. enjoy your evening and i will see u tomorrow at 10am.
Gary
Thursday, 9 December 2010
Tree texturing
Guys,
I have just been looking at the texturing of the tree. I know that we had written off using the wood texturing that is built into Maya quite early on in favour of a UV Mapped solution; but from studying it at closer glance, I have found that it actually has quite a nice, rough texture and could fit well in our piece.
Take a look at these two images, compare them and let me know which you think works better.

UV Textured Tree

"Wood" Textured Tree
Tuesday, 7 December 2010
Maya and Adrive files
Just to let you all know, the UV mapped files have now been put on the Adrive, under the the directory, UV Mapped, which can be found under the Finished Models/Scenery directory
And also, for the benefit of Perri, here is the link for a free Maya 2011 http://students.autodesk.com/?nd=download_center
You may need to create an account on Autodesk first
Creating sky using envSky
Hi everyone,
Make sure you check out my previous post and give me your feedback. In the meantime, I have discovered a technique of creating a sky by applying an envSky texture to a camera and then adjusting the density of the clouds, along with Sun Brightness and Sky colouring. This means that I can simply apply and keyframe animate a sky texture (either day or night) once the set decoration and camera set-up has been done; without the need for further modelling.
I have done a basic test of a sun setting, using envSky. It is only very quick but let me know if you think this works well or not.
Texturing replanning
Hi All,
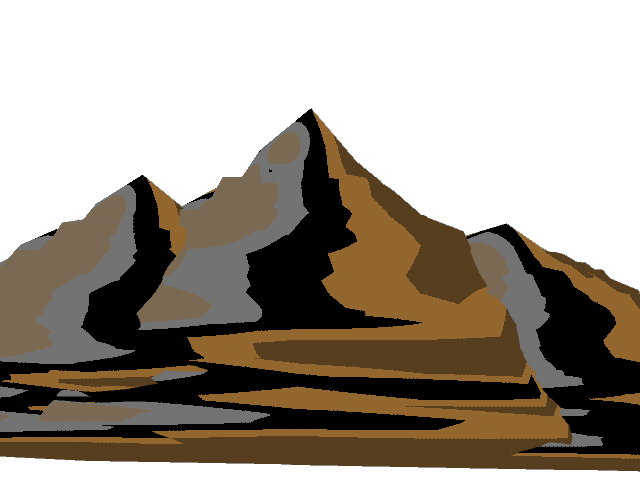
I am starting to reconsider texturing schemes for this project. I will still keep cell shading in this project to some extent, but we need to apply other means of texturing that are not as smooth to larger models that will largely fill the background, such as the mountains. This is because we have quite a flat sense of composition at present and we will need to convey the sense of openness in the Serengeti.
For the sky, I am considering going back to this idea, please let me know what you think!!!
Monday, 6 December 2010
Perris new blogg link
ok guys this is the direct link to my personal blogg link o the environments project. the one you have at the moment is connected to the wrong page
http://myenvironmentaldesignproject.blogspot.com/
Friday, 3 December 2010
And also...
Perri, here's a post that should make you happy. I have illustrated the changes you need to make to a Maya ASCII file in order for it to work in Maya 2010. You should be fine now.

Masai man is all done :D
I just finished the rigging and texturing of the Masai man in the space of about 10 minutes :D
 I presume that this model will only appear in silhouette, so I have given him a simple black Solid Colour texture. If you need any more textures to be applied to him, please give me a shout


Also, Perri and Alex, could one of you model a spear or something for him, so he will be more identifiable as a Masai in the final piece? Thanks in advance.
This will be going on the Adrive in a moment, for you to have a look at.
ok guys its time for scene layout!!!


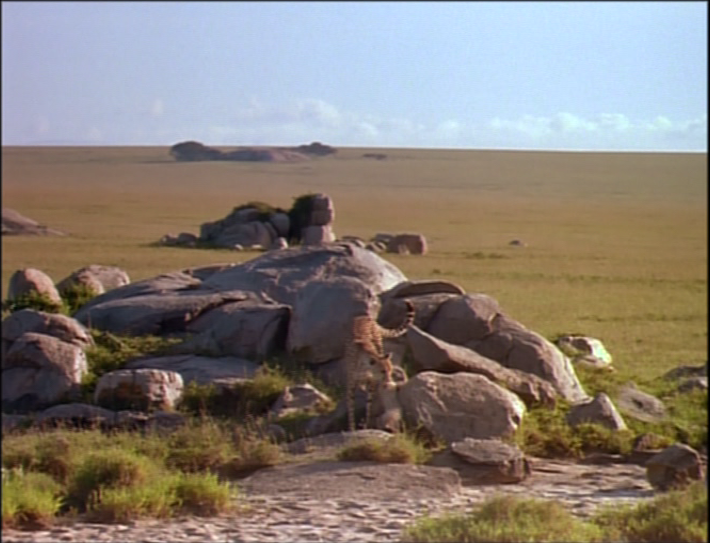


Guys its that time when models are made and we need to put together the scene layout. so i watched a few videos and a few more and a few more and i took some screenshots from the Africa- The Serengeti film that could help with the set decorating.


Thursday, 2 December 2010
Crocodile is done
I have done the rigging and texturing for the crocodile. For the crocodile, I did not put in a complete rig, as I did with all the other animals, but I put one through its chest and into its tail.


I then applied an IK handle to the crocodile's tail. The reason I did not do a full rig is because this animal will be submerged in the lake and only the top half will be visible.
I also textured the crocodile using a Three Tone Shaded Brightness and here is the outcome.

Wednesday, 1 December 2010
Lake
I have just made a lake, which is based on this doodle from Gary
 I made it using a NURBS curve, which I then made into a planar surface and applied an Ocean Shader. Here is the outcome:

This will be available on the Adrive pretty shortly ;)
Adrive
Just to mention, I have moved a few things around in the adrive, just to make it tidier. I have moved all the fully textured animal models, both binary and ASCII, into their own folder; which is called 'animals' and is a subdirectory under the 'finished models' folder. All the scenery has been moved into a folder called 'scenery' and is also under the 'finished models' folder. It couldn't be more simple! :P
I suggest you all do the same when you post up models to the adrive to be rigged/textured/set decorated/animated/etc.
Fish eagle is done and is going on the adrive
The fish eagle has now been textured; I used this image as a reference.


To texture the bird, I applied five different forms of Toon shader to each part of the body. Around the head and tail, I applied I white solid colour texture. As for the torso, I applied a brown solid colour texture. The wings have a brown and dark grey Shaded Brightness Two Tone texture. The beak and feet have a Shaded Brightness two tone texture, that is yellow with a hint of grey. The eye is also a Shaded Brightness two tone texture which is largely black with some red.


Lion king - The musical
Hi guys a few weeks ago i went to watch The Lion King - The Musical and i thought it was spectacular and the light changes throughout were amazing this really inspired my thoughts on the project. I could not film or take pictures due to restrictions but i have found this video on youtube that shows a lot of the lighting and the effect the lighting has. take a look or even go and watch the show you wont regret it :)
Tuesday, 30 November 2010
Fish eagle rigging
I now needed to rig the fish eagle. As I was not sure how many joints to place in its wings, I used this video as a reference.
When I rigged the fish eagle, there were quite a few issues such as the wings moving with the tail and the feet moving with the wings and tail, but I resolved these by putting quite a lot of work into the painting weights.


When I rigged the fish eagle, there were quite a few issues such as the wings moving with the tail and the feet moving with the wings and tail, but I resolved these by putting quite a lot of work into the painting weights.


Wednesday 1st December!!!!! Group Meeting!!!
Hi guys i am writing to tell you all that i am calling a group meeting on wednesday 1st December. Modelling should be finished by then and then we will be starting the next stage of creating our layout of our environment. I want everyone in and that includes Perri (make sure you dont read the date wrong WEDNESDAY 1ST DECEMBER).
Also Perri we were not able to do our formative because you did not arrive so i expect an apologie to the group in person on wednesday :) I also presume there is no problem with the modelling due to the fact i have not heard from you so i expect to see that wednesday.
cheers Gary
Also Perri we were not able to do our formative because you did not arrive so i expect an apologie to the group in person on wednesday :) I also presume there is no problem with the modelling due to the fact i have not heard from you so i expect to see that wednesday.
cheers Gary
Monday, 29 November 2010
Scenery Texturing
Here are the models that I have fully textured, using Shaded Brightness Two Tone and Three Tone textures.


Ocean shader test
Here is another ocean shader test I just did, in order to complement the style that we are going for. This still looks quite realistic, but I have increased the diffuse to increase the vibrancy.
Friday, 26 November 2010
A few tests with enviroment

Yo guys alex put the environmental modelling on the a drive account so i decided to do a few tests and see how they work with the characters so here is a few images.


Tuesday, 23 November 2010
Lion model complete
Here is the lion model that I have just rigged and textured.
 It is now available in the Adrive account, under the folder 'Finished models', along with the Rhino and Wildebeest.

Quick rhino animation and cel shading test!!!
This is a quick animation test for the rhino and exloring the use of cel shading. its a quick one but i wanted to show that things are working and what is possible in just a few minutes.
Wildebeest textures
Here are some various textures that I have applied to the wildebeest. These are all Shaded Brightness Two/Three Tone textures.


And here is a test animation to see how an animated model looks with cell shading.
Wildebeest is done!
As far as the rigging is concerned anyway. I have managed to fully rig the wildebeest with very little trouble.

This is largely because I raised the problems I was having with the elephant and rhino rigs with the tutor, namely how the whole geometry of these rigs was influenced by the leg joints. He showed me a tool called the Paint Skin Weights tool which is used to control the influence each joint has on certain areas of the geometry. This is done by painting areas that are supposed to have little influence from certain joints black; and areas that have a lot of influence from joints white.

Monday, 22 November 2010

Texturing experiments with Rhino
I've done a few experiments with the texturing; we are still trying to decide between the "cartoon effect" of cell shaded textures of if we want to have some realistic texturing as well.
Here are some images of a rhino with Shaded Brightness Two Tone textures; I played around with different shades of black, grey and blue.


And here is a rhino, which has been textured with a Photoshop file, based on the skin of a rhino.

Here are some images of a rhino with Shaded Brightness Two Tone textures; I played around with different shades of black, grey and blue.


And here is a rhino, which has been textured with a Photoshop file, based on the skin of a rhino.

I still need to brush up UV Mapping, but I have a tutorial tomorrow; but here are some clear styles that we can play with.
Fully rigged rhino
I have fully rigged the rhino that was modelled by Perri, it looks good but I am considering replacing the FK handles in the legs with IK handles to make animating the movement easier.


The next stage is to experiment with the texturing of this beast.
Subscribe to:
Posts (Atom)